Introduction to Virtual Environments in Python
Virtual environments are a powerful tool in Python development that allows you to create isolated environments for your projects. By creating a virtual environment, you can separate project dependencies, avoid version conflicts, and ensure consistent behavior across different projects. In this article, we will explore the concept of virtual environments in Python and guide you through the process of setting up and using them effectively.
Understanding Virtual Environments
What are Virtual Environments?
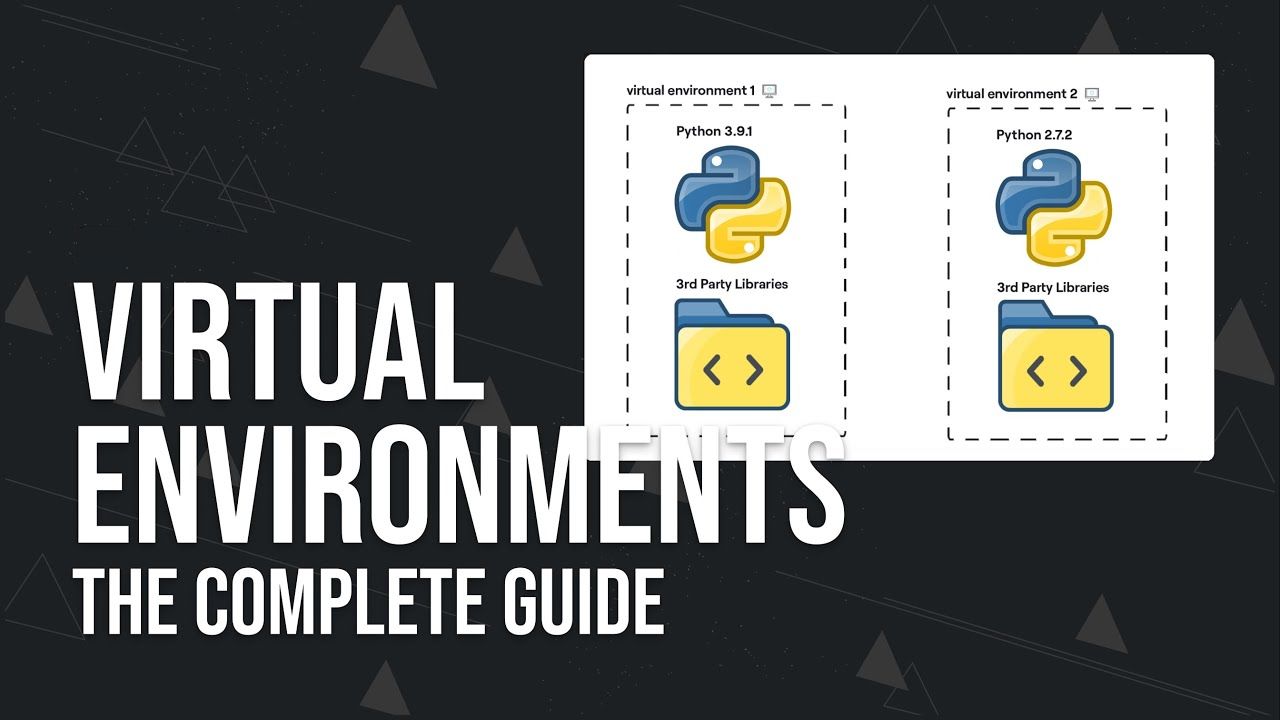
A virtual environment is an isolated Python environment that contains its own Python interpreter and installed packages. It allows you to create a sandboxed environment for your project, ensuring that the dependencies of one project do not interfere with another.
Why Use Virtual Environments?
Virtual environments offer several benefits in Python development:
- Dependency Isolation: Each project can have its own set of dependencies, preventing conflicts between different projects.
- Consistent Environment: Virtual environments ensure that all developers working on a project have the same versions of Python and installed packages.
- Easy Project Setup: Virtual environments simplify the process of setting up a new project by providing a clean environment with all the required dependencies.
- Portability: Virtual environments can be easily shared or deployed to other machines, ensuring consistent behavior.
Setting Up Virtual Environments
Using venv module (Python 3)
Python 3 comes with a built-in module called venv, which allows you to create and manage virtual environments. Follow these steps to set up a virtual environment using venv:
- Open a terminal or command prompt.
- Navigate to the directory where you want to create the virtual environment.
- Run the following command to create a new virtual environment:
python3 -m venv myenv
Replace myenv with the desired name for your virtual environment.
- Activate the virtual environment:
- On macOS and Linux:
source myenv/bin/activate
- On Windows:
myenv\Scripts\activate.bat
- You will now see the name of the virtual environment in your command prompt, indicating that you are working within the virtual environment.
H3: Using virtualenv (Python 2 and 3)
If you’re using Python 2 or prefer to use virtualenv, you can follow these steps:
- Install
virtualenvif you haven’t already. Run the following command:
pip install virtualenv
- Open a terminal or command prompt.
- Navigate to the directory where you want to create the virtual environment.
- Run the following command to create a new virtual environment:
virtualenv myenv
Replace myenv with the desired name for your virtual environment.
- Activate the virtual environment:
- On macOS and Linux:
source myenv/bin/activate
- On Windows:
myenv\Scripts\activate.bat
- You will now see the name of the virtual environment in your command prompt, indicating that you are working within the virtual environment.
H2: Managing Virtual Environments
H3: Installing Packages in a Virtual Environment
Once you have activated your virtual environment, you can install packages as usual using pip. For example, to install the requests package, run the following command:
pip install requests
The package will be installed within the virtual environment, ensuring that it does not affect other projects.
H3: Deactivating a Virtual Environment
To deactivate a virtual environment

Hi all, my name is Angelika and I am one of the authors of the EasyTechh website. Like the rest of our team I am incredibly ambitious and I love helping people.
That’s why I write here and not only here 😉 I write interesting and useful for people articles in the IT sphere and a little bit about life.
Enjoy reading.


+ There are no comments
Add yours